
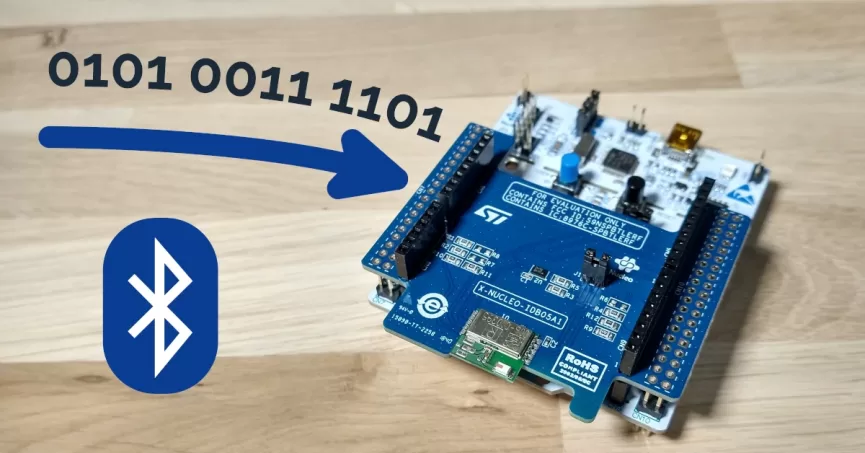
Bluetooth Low Energy (BLE) is a popular network technology, especially for embedded and mobile devices. This example shows how you could use Embedded Proto to set up data structures to communicate between devices using BLE in a structured way. In this example, embedded proto is used to make messages for turning on a lead on the microcontroller and retrieving a sensor value from the microcontroller.
In the following, we will take you through the setup of this example, what kind of messages are used, and how the embedded code receives and sends the messages. Finally, we will look at how to run the code.
Source code
The source code for this example is available on GitHub.Version
This example is up to date with version 3.4.2 of the source code.The setup
During this example, we are using a NUCLEO-F446RE made by ST Microelectronics. This is an easy-to-use development board with an ARM Cortex-M4 processor. The board does not require an additional programmer and is readily available. For Bluetooth Low Energy, we use an X-NUCLEO-IDB05A1 evaluation board.
Connect the BLE evaluation board to the microcontroller and connect the microcontroller via USB to your PC.
The code in the repository is divided into four folders:
Tree -L 1
.
├── Desktop
├── EmbeddedProto
├── Nucleo-f446re
└── proto
The desktop folder holds the scripts to be run on the PC. It is a Python script used to make a Bluetooth connection with the microcontroller and transmit and receive messages.
The EmbeddedProto folder holds Embedded Proto as a git submodule. This way, it is possible to track matching versions of this example and Embedded Proto.
The nucleo-f446re folder holds the embedded code. It is a project made with STM32CubeIDE version 1.6.0. The IDE generated most of the code to get a quick start on the basic initialization of the GPIO on the board and the Bluetooth low-energy module.
The proto folder holds the definition of the protocol buffer messages used in this example. The following paragraph discusses these messages in more detail.
Installation and Setup
The details on how to install this example are described in the README present in the repository with the source code.The messages
For this example, two messages have been defined. The first one is a command message and contains a variable led which is used to control the state of the led. The microcontroller receives this command message and sets the LED according to the value (on, off, or do nothing).
The second message is a sensor used to obtain an emulated sensor value.
syntax = "proto3";

message Command {

  enum LED {
	NoAction = 0;
	Off = 1;
	On = 2;
  }

  LED  led = 1;
}

message Sensor {
  uint32 light_sensor = 1;
}
Sending and receiving over BLE
BLE Services and Characteristics
Next, we will look at the embedded code and how the BLE communication works. BLE uses Generic Attribute Profile (GATT) to exchange data between BLE devices. GATT introduces data hierarchy; GATT-based profiles consist of services, and each service consists of one or more characteristics.

An Embedded Proto service is defined in BlueNRG_MS/App/EmbeddedProto_service.c, which consists of two characteristics. These characteristics are used for sending and receiving the protobuf messages, command and sensor. Each of these services has a unique id, a UUID. Both these IDs and the service’s id are defined in BlueNRG_MS/App/EmbeddedProto_service.c.
Source code
The service and characteristics in this example are based on code provided by X-CUBE-BLE1.The command characteristic can only be written from the MCU’s point of view. This means that the desktop code, our python script, will perform a write command. The python BLE interface will asynchronously send the command characteristic id and serialized protobuf data b: await client.write_gatt_char(COMMAND_CHAR_UUID, b). In our case, this data contains information on what to do with the LED, switch it on or off.
The sensor characteristic can only be read from the point of view of the MCU. This means we can not send data towards it from our python desktop script but only request to receive data. Again we perform an asynchronous call to the python BLE interface, this time stating the sensor characteristic id and expecting data to be received: bytes = await client.read_gatt_char(SENSOR_CHAR_UUID). The data received can be deserialized to obtain the current value of our fictive sensor.
Embedded data serialization
All processing of the protobuf messages, such as serialize and deserialize, is described in the BLEProcessCommand.cpp file.
In the ble_receive_command function, the command is received and deserialized. Next, the command is processed, which in this case controls the led on the Nucleo board.
void ble_receive_command(uint8_t *byte, uint8_t data_length) {
  // The data received is framed. The first byte represents the
  // number of bytes in the protobuf message. Lets obtain this length.
  uint8_t n_bytes = byte[0] + 1;

  if(n_bytes < data_length) {
    // Copy the data except the length to the deserialization buffer.
    read_buffer.set(byte + 1, n_bytes);

    // Deserialize the data received.
    auto deserialize_status = received_command.deserialize(read_buffer);
    if(::EmbeddedProto::Error::NO_ERRORS == deserialize_status) {
      // Process the command.
      process_command(received_command);
    }
  }
}
In the ble_send_sensor function, a random value for the sensor is generated. This message is serialized and sent through the sensor characteristic to the PC.
void ble_send_sensor(void)
{
  // Clear the buffer to start clean
  write_buffer.clear();

  // A little hack, "use" the first byte so we can later place the length here.
  write_buffer.push(0);

  // Generate some fake sensor data and set it in the message.
  uint32_t val = rand() % 100;
  sensor.set_light_sensor(val);

  // Serialize the data.
  const auto serialization_status = sensor.serialize(write_buffer);
  if(::EmbeddedProto::Error::NO_ERRORS == serialization_status)
  {
    // Calculate the data length, compensating for the "used" byte.
    const uint8_t n_bytes = write_buffer.get_size() - 1;
    // And store the length in that first byte.
    write_buffer.get_data()[0] = n_bytes

    // Next actually send the framed data over BLE.
    Sensor_Update(write_buffer.get_data(), write_buffer.get_size());
  }
}
Did you spot the bug?
In this example you see me using a method of data framing where we reserve just one byte for the length. This is of course a high risk for a bug, what if your data is longer than 256 bytes! More on data framing in a later post.Running the Code
To connect to the BLE chip, we need to know its address. This is different for each BLE chip, so you will have to find it out for your device. This can be done by connecting the nucleo and BLE chip to your pc and loading the firmware. Let it run, and use the Bluetooth management tool of your system to discover available devices. Please make sure that Bluetooth is enabled on your system. On mine, the device showed up like this:
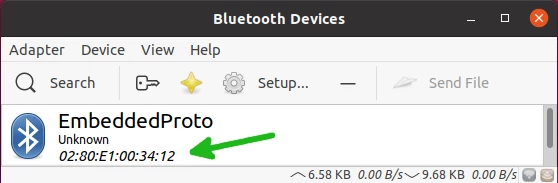
We can now take this address and copy it into our python script so it will only connect to this device.
###############################################
# FILL IN THE SENSOR ADDRESS OF YOUR BLE CHIP #
###############################################
address = "02:80:E1:00:34:12"
Now we can run the script by entering the python virtual environment created during setup and starting python. We do this in the desktop folder.
source ./venv/bin/activate
python main.py
Next, you must wait a bit for the device and script to connect. This may take a few seconds. Once they do, you will be prompted with the options you can choose from. Pressing the desired keys on your keyboard will give you a response like:
trying to connect to: 02:80:E1:00:34:12
Command keys are:
y to turn on LED
n to turn off LED
g to get sensor value

If your done press "Q"
Next command: y
Next command: n
Next command: y
Next command: n
Next command: g
33
Next command: g
43
Next command: g
62
Next command: Q
Terminating script
Pressing the ‘y’ on the keyboard turns on the green led on the Nucleo, and pressing ‘n’ turns off the led. This lead is hard to see as it is half under the Bluetooth shield. Pressing ‘g’ reads a random value from the emulated sensor.
If you find this kind of example informative, please consider reading one of our other examples, like An Mbed OS ethernet example with Embedded Proto. Also, share Embedded Proto with your colleagues!