
In this example we will demonstrate how to set up a project with Embedded Proto using STM32CubeIDE.
The example below makes use of the NUCLEO-F466RE board, made by ST Microelectronics.
The steps required to set up a project are:
1. Start a new project in the IDE
2. Initiate Embedded Proto
3. Automatically convert *.proto files.
4. Build the project
In this example we assume that you have already set up your development environment and installed the pre-requirements. If not yet, please follow the Linux or Windows instructions to set up your development environment first.
Source code
The source code for this example is available on GitHub.Version
This example is up to date with version 3.4.2 of the source code.1. Start a project
As the name suggests, STM32CubeIDE integrates CubeMX with what used to be Atollic TrueSTUDIO. ST Microelectronics bought Atollic a few years ago and subsequently released the integrated solution under the name STM32CubeIDE. This makes it easy to start projects based on STM32 microcontrollers.
Follow the steps below to start a project:
- Start STM32CubeIDE
- Select “File → New → STM32 Project”.
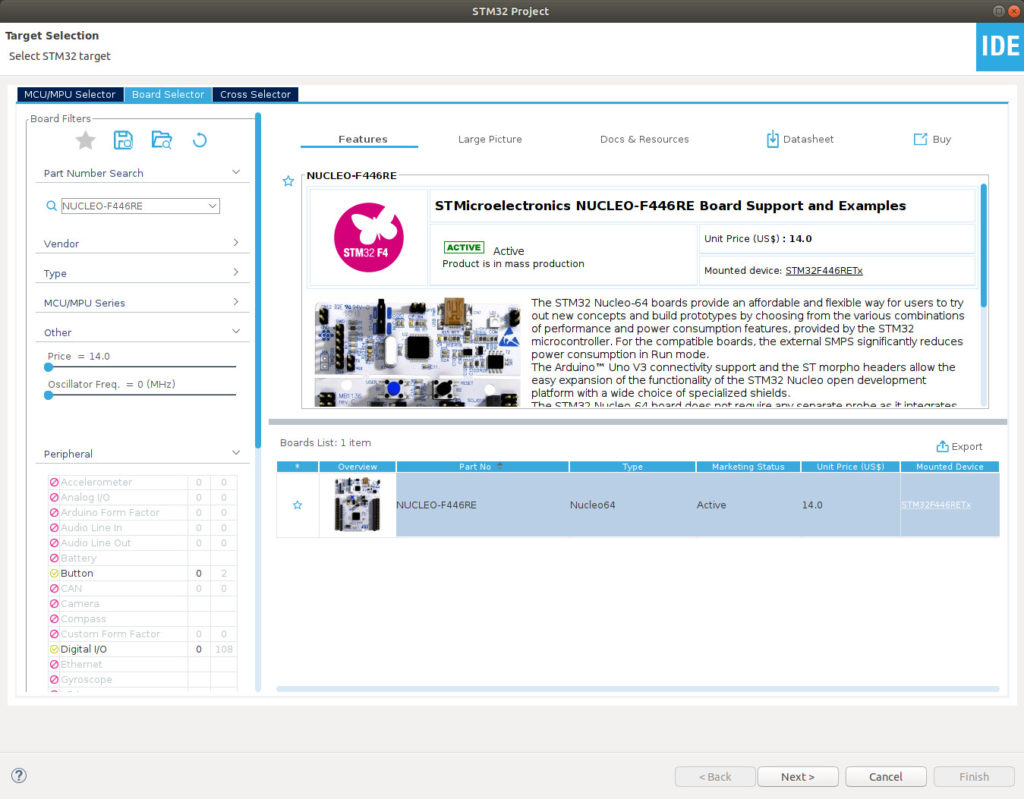
- This will open the “Target Selector” displayed in the screenshot below.
- NOTE: In this example we have selected the NUCLEO-F446RE development board from STM. You can freely select any board you want in your case, with a minor effect on how to use this example.
We have not used any specific peripherals from the chip.
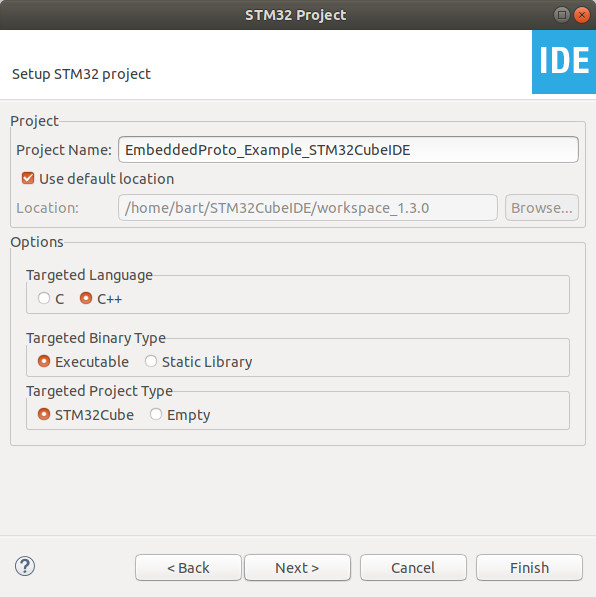
- After selecting your board or chip you are prompted with a window in which you can set up your project folder. Another configuration is selecting the C++ option.
- Once the configuration for this example is complete, press “Finish”.
- The device configuration tool will now open.
- In this tool you can generate the source code developed by STM.
- This will set up the HAL and CMSIS from ARM based on the peripherals selected.
- The defaults were left as is, as it is not applicable in this example.
- The STM code is generated when you press “Build”.
2. Initiate Embedded Proto
In this step we will add Embedded Proto to the project. Our advice is to do this as a git sub-module.
- First initialize a git repository in the project directory. We suggest adding all the files generated with the IDE in the previous step.
cd PROJECT_DIR
git init
git add .
git commit –m “IDE generated files”
- Next, add Embedded Proto as a git sub-module. By doing this you will be able to manage the version of Embedded Proto you are actively using.
- Checkout the latest version of the library and commit it to the repository of the example project.
git submodule add git@github.com:Embedded-AMS/EmbeddedProto.git
cd embeddedproto
git checkout latest
cd -
git add .gitmodules
git commit –m "Added the Embedded Proto library as a submodule on the latest version."
All the Embedded Proto code is now present to automatically convert *.proto files.
3. Automatically convert *.proto files
Ideally the source files would be generated every time the *.proto files change. At the time of writing this, this is not easily supported in this IDE. Thus, the next best solution is demonstrated in this example:
- Generate all .proto source files every time the project is built. This is done by adding a “Builder” in STM32CubeIDE.
In our case this is a small script executed during each build. This script will call protoc for each. .proto file and generates its C++ source code. See the code used in this example below:
#!/bin/bash
cd ./embeddedproto
# Execute protoc on the various *.proto files.
protoc --plugin=protoc-gen-eams=protoc-gen-eams -I../proto --eams_out=../Core/Generated ../proto/reply.proto
protoc --plugin=protoc-gen-eams=protoc-gen-eams -I../proto --eams_out=../Core/Generated ../proto/request.proto
These scripts will be stored in the root folder of the example. If you have something like a scripts folder in your project you can place it there but be sure to check that all paths used in the script are correct. You can set the working directory of the script via the IDE as discussed below.
The IDE new builder is added by going to: “Project” → “Properties” and select the “Builders” tab. Make a “new” entry here.
- A pop-up screen will open. Select “Program”.
- In the dialog that opens, set the path to the script and its working directory.
- Press OK
- After pressing “OK” you can move the new builder “up” to make sure it is the first one executed when starting a build.
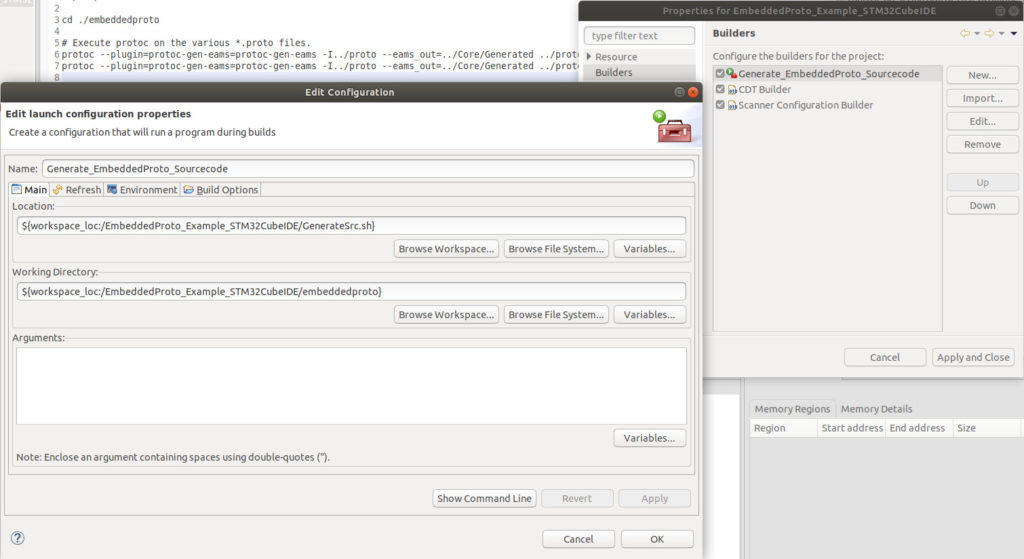
The other builders you see in the “Builders” tab are the ones configured by default to build your project.
4. Build the Project
Now that the toolchain has been set up it is time to add some source files. The following files are added alongside the boilerplate code from CubeMX and Embedded Proto:
$ tree -L 3
.
├── Core
│ ├── Inc
│ │ ├── DemoReadBuffer.h
│ │ └── DemoWriteBuffer.h
│ ├── Src
│ │ └── main.cpp
├── GenerateSrc.sh
└── proto
├── reply.proto
└── request.proto
Bottom to top: If you look at the files in the tree overview, the first file discussed in the example is the last one in the tree, and the last file discussed is at the top.
Reply.proto and request.proto
These two files are basic examples of what could typically be a communication between the microcontroller and another device. The request .proto file holds a simple message with only two fields: a message ID number and the response which should be sent back via the reply messages.
syntax = "proto3";
package demo;
enum types
{
  A = 0;
  B = 1;
}
message request
{
  uint32 msgId	= 1;
  types selection = 2;
}
The reply .proto file contains multiple messages, one containing the two options possibly selected by the request:
syntax = "proto3";
package demo;
message A
{
  uint32 x = 1;
  uint32 y = 2;
  uint32 z = 3;
}
message B
{
  double u = 1;
  double v = 2;
  double w = 3;
}
message reply
{
  uint32 msgId = 1;
  oneof type
  {
    A a = 2;
    B b = 3;
  }
}
GenerateSrc.sh
This is the builder script discussed in the previous section.
Main.cpp
Rename main.c, obtained from the boilerplate code of CubeMX to main.cpp. This is required to compile the file with C++ compiler, instead of the C compiler.
Some code has been added to demonstrate common operations performed on messages.
DemoReadBuffer.h and DemoWriteBuffer.h
These two files are here for support, to serialize and deserialize the data. In a real application this would typically be integrated with your communication protocol.
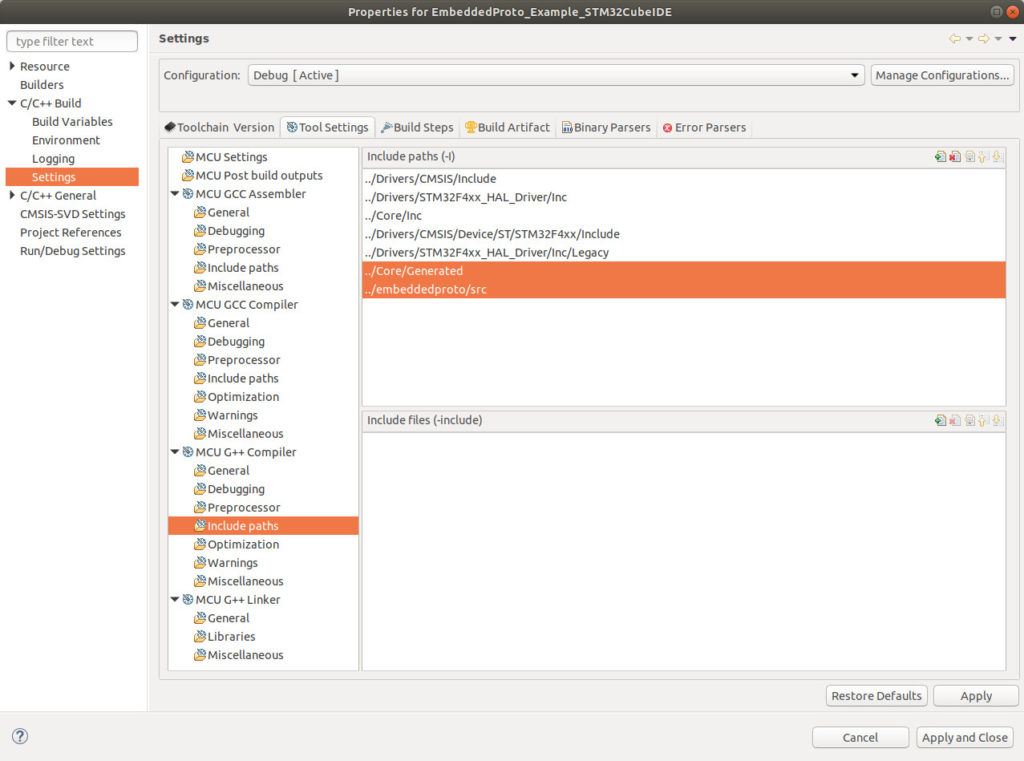
For this example, we must add the new source and header folders to the project configuration. The first images below show that the folders with code generated by Embedded Proto are included in the include paths. The static headers of Embedded Proto are also included .image adds the second static sources of Embedded Proto to the project.
We are now ready to build the project.