
This example shows how you could communicate over ethernet using TCP sockets in a structured manner to a development board. We are using Mbed OS, the RTOS operating system on the NUCLEO-F767ZI development board. To serialize data we use Embedded Proto for generating the embedded code. As a demo server, we use a Python script running on a desktop PC.
When the user button on the dev. board is pressed, a status message is sent to the TCP server. This status message contains data such as emulated sensor values.
In the following, we will take you through the setup of this example, how the message looks like and how the embedded code sends the message. Finally, we will look at how to run the code.
Source code
The source code for this example is available on GitHub.Version
This example is up to date with version 3.4.2 of the source code.The setup
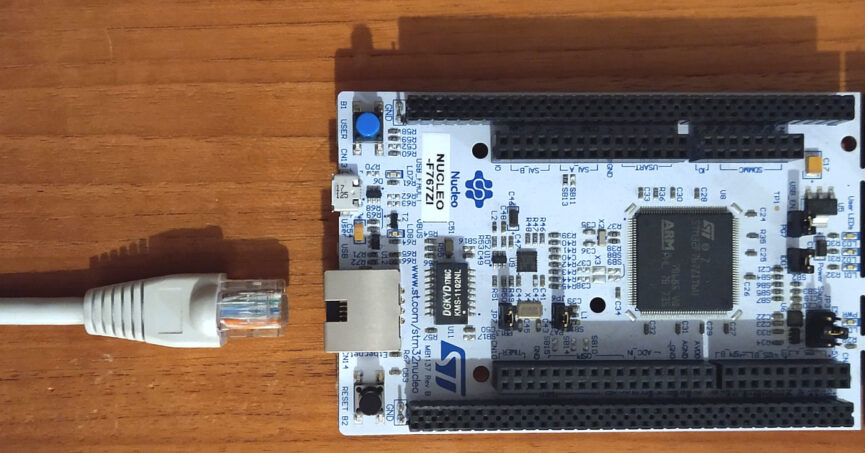
During this example, we are using a NUCLEO-F767ZI development board made by ST Microelectronics. This is an easy-to-use development board with an ARM Cortex®-M7 processor. The board does not require an additional programmer and is supported by Mbed OS. This RTOS provides software support for various connectivity options, such as Ethernet.
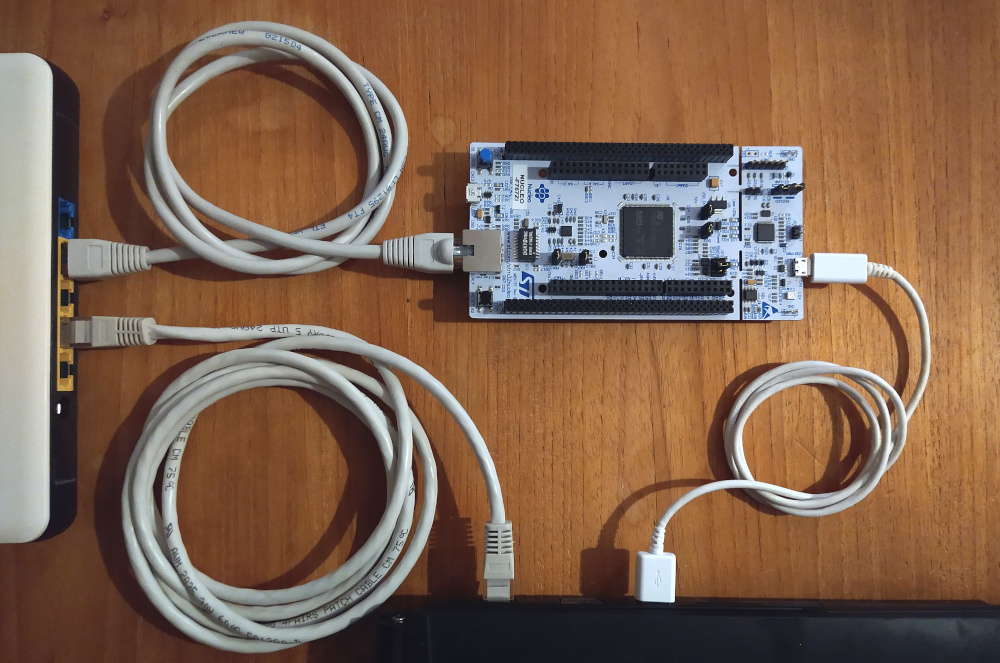
Connect the microcontroller via USB to your PC and connect an ethernet cable to the PC and microcontroller.
The code in the repository is divided into four folders:
tree -L 1
.
├── desktop
├── EmbeddedProto
├── nucleo-f767zi
└── proto
The desktop folder contains the script to be run from the PC. It is a python script that is used to receive the status message from the NUCLEO board. This script sets up a TCP server to which the MCU can connect.
The EmbeddedProto folder holds Embedded Proto as a git submodule. This way it is possible to track matching versions of this example and Embedded Proto.
The nucleo-f767zi folder holds the code for the MCU. It is a project made with Mbed Studio version 1.3.1.
The proto folder holds the definition of the protocol buffer message used in this example. The next paragraph discusses this in more detail.
The messages
For this example, one message has been defined, a status message. This message contains multiple fields: the state of the onboard led, the time the board is running, and emulated sensor values for temperature, humidity, and wind speed. When the blue user button on the NUCLEO board is pressed, this status message is sent to the TCP server.
message Status
{
  enum LED
  {
    LedUndefined = 0;
    LedOff = 1;
    LedOn = 2;
  }

  LED led = 1;
  uint64 run_time = 2;
  float temperature = 3;
  float humidity = 4;
  float windspeed = 5;
}
Sending and receiving over ethernet using Mbed OS
Next, we are going to take a look at the embedded code and how the communication works using ethernet. The communication has been set up very simply. Each transmitted message is preceded by one byte stating how long the serialized message is. This is done to know when a complete message has been received.
Stepping through the process we start on the microcontroller code. When the user button (blue button on the NUCLEO) is pressed the function send_status() is called. First, in this function, the fields of the message are set. Each time the button is pressed the led is toggled. This is illustrated by the following code:
void send_status()
{
  nsapi_size_or_error_t result;
  uint64_t run_time =  t.elapsed_time().count();

  switch(status.led()){
    case Status::LED::LedUndefined:
      led2.write(1);
      status.set_led(Status::LED::LedOn);
      break;
    case Status::LED::LedOff:
      led2.write(1);
      status.set_led(Status::LED::LedOn);
      break;
    case Status::LED::LedOn:
      led2.write(0);
      status.set_led(Status::LED::LedOff);
      break;
    default:
      break;
  }

  status.set_run_time(run_time);

  float temperature = 5.0 * ((float)rand() / (float) RAND_MAX) + 20.0; //random number between 20.0 and 25.0
  float humidity = 30.0 * ((float)rand() / (float) RAND_MAX) + 50.0; //random number between 50.0 and 80.0
  float windspeed = 20.0 * ((float)rand() / (float) RAND_MAX); //random number between 0 and 20.0

  status.set_temperature(temperature);
  status.set_humidity(humidity);
  status.set_windspeed(windspeed);
Next, the message is serialized, before being sent using TCP sockets. Finally, the write_buffer is cleared.
  uint32_t message_len_index = write_buffer.get_size();
  write_buffer.push(0); //placeholder for message length

  auto serialization_status = status.serialize(write_buffer);
  if(::EmbeddedProto::Error::NO_ERRORS == serialization_status)
  {
    write_buffer.get_data()[message_len_index] = write_buffer.get_size()-1;
    result = socket.send(write_buffer.get_data(), (nsapi_size_t) write_buffer.get_size());
    if(result < 0) {
      printf("Error! socket.send() returned: %%d\n", result);
      disconnect();
    }
    else {
      printf("Status sent\n");
    }
  }

  write_buffer.clear();
}
The python script receives this message as illustrated in the following code snippet. The script checks if all the bytes have been received, then it deserializes the message and prints the data in the message.
data = connection.recv(50)
length = data[0]

if 0 < length:

  # Check if we have received all bytes.
  if length == len(data[1:]):
    data = data[1:length+1]
    status = eth_messages_pb2.Status()
    status.ParseFromString(data)

    print("\nStatus Message")
    if status.led == eth_messages_pb2.Status.LED.LedUndefined:
      print("Led status: undefined")
    elif status.led == eth_messages_pb2.Status.LED.LedOff:
      print("Led status: off")
    elif status.led == eth_messages_pb2.Status.LED.LedOn:
      print("Led status: on")

    print("Run time: ", "{:.2f}".format(status.run_time/1e6), "seconds")

    print("Temperature: ", "{:.2f}".format(status.temperature), "degrees celcius")
    print("Humidity: ", "{:.2f}%%".format(status.humidity))
    print("Windspeed: ", "{:.2f}km/h".format(status.windspeed))
Running the Code
Now we can run the code. Connect the USB cable to NUCLEO-F767ZI and to the PC. Connect an ethernet cable from a router to the NUCLEO-F767ZI. Next, make sure your PC is connected to the same router.
Next program the NUCLEO-F7676ZI, you program the microcontroller using Mbed Studio or using the Mbed CLI. This program has been tested successfully with both the GNU Arm Embedded version 9 (9-2019-q4-major) and Arm Compiler version 6.14.
To open the project using Mbed Studio. Click File -> open workspace and select the nucleo-f767ZI folder as a new workspace. Now the project will be visible in Mbed Studio. The details of how to install this example are described in the README (link) of this example.
To keep things simple we hard-coded the IP address of the server in the embedded code. To obtain the IP address from your desktop or laptop and substitute it in the embedded code, main.cpp:
// Supstitude the IP addres of your server here.
valid =  a.set_ip_address("192.168.0.101");
To program the NUCLEO press the play or debug button in Mbed Studio. The IDE should give you feedback about the progress while LEDs are blinking on the board, indicating the chip is being programmed.
Now that the NUCLEO is programmed, start the desktop script in the python virtual environment:
cd desktop
source venv/bin/activate
python3 main.py
This will start up the TCP server, you should see that the server starts at a certain IP address and waits for a connection. Make sure that the server is reachable by the NUCLEO. If the NUCLEO is already programmed you can press the reset button (black), and now the NUCLEO will connect to the TCP server. The NUCLEO sends a status message when you press the blue user button. It should look something like this over the USB UART connection:
$ cat /dev/ttyACM0
Embedded Proto socket example using Mbed OS

Mbed OS version: 6.9.0

IP address: 192.168.0.100
Netmask: 255.255.255.0
Gateway: 192.168.0.1
Connect to: 192.168.0.101
Status sent
Status sent
The python server will output the received data:
Hostname: EAMS IP address: 127.0.1.1
waiting for a connection
connection from ('192.168.0.100', 57527)

Status Message
Led status: on
Run time:  26.79 seconds
Temperature:  23.37 degrees celcius
Humidity:  76.60%%
Windspeed:  14.93km/h

Status Message
Led status: off
Run time:  26.93 seconds
Temperature:  24.91 degrees celcius
Humidity:  70.84%%
Windspeed:  16.62km/h
If you find this kind of examples informative please consider reading one of our other examples like Store data on NFC tags with Protobuf.